Archive for the ‘maintenance’ Category

Should I Turn Off the Pilot Light for My Gas Fireplace in the Spring?

Tuesday, May 31st, 2022

Most people in the Puget Sound region don’t use their gas fireplaces during the warmer months of the year in spring, summer, and early fall. So, it’s a common question – should you turn off your pilot light during those months? Is it dangerous or wasteful to leave it on?

The short answer is – you do not need to turn off your pilot light, and there is little risk in leaving it on all summer. Leaving it on is the simpler way to go. But, if you want to turn it off, you can, and there’s no harm in that either.

For more details about shutting off your pilot light, keep reading.

What Is a Pilot Light?

photo of a fireplace pilot light burning

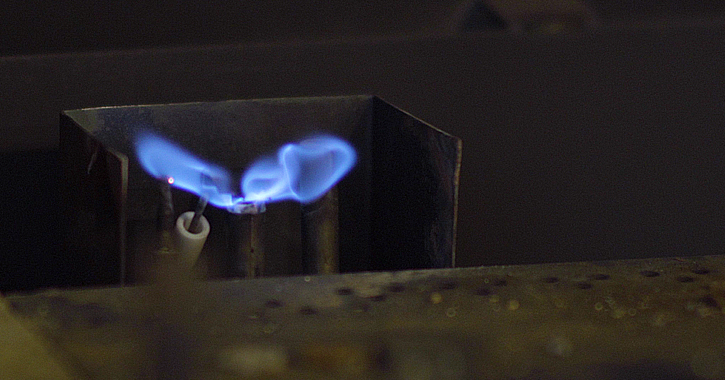
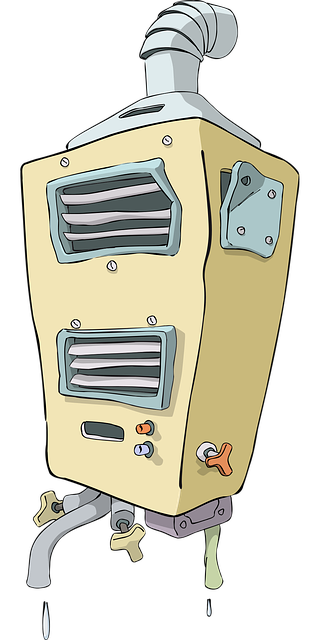
Your gas fireplace is never actually ‘off’ in the usual sense of that word. For most fireplaces, there is a very tiny flame that is always burning, and that’s called your pilot light. Some newer fireplaces feature a standing pilot system with an ‘intermittent pilot,’ where the pilot isn’t actually on all the time. But in general, when you flip the switch that turns ‘on’ your gas fireplace, what you’re really doing is just increasing the flow of gas and enabling the larger fire to burn.

The pilot light is what makes the gas fireplace so easy to use.

Compare it to a gas barbecue. For a BBQ, you have to ignite the flame every time you use it. There is no flame always burning. But with a gas fireplace, and other gas elements in your home, the pilot light never stops burning, unless you have a standing pilot system, as mentioned. Either way, everything lights when you turn it on, every time.

What Happens if I Leave My Pilot Light Burning All Year?

In theory, nothing happens, and there’s nothing wrong with doing this. And in fact, it has a couple advantages. If you were to turn off your pilot light, there’s always a small chance a spider will crawl in there and build a web. That will greatly complicate the process of turning the pilot light back on in the fall. Leaving it on ensures this won’t happen.

It’s also true that there is a small cost to leaving the flame burning year-round. Costs vary depending on the price of natural gas in your area. The cost works out to around $5 per month in most places, give or take.

Hiring a technician to re-light your pilot light in the fall will surely cost more than that, so turning off your pilot light to save money doesn’t really make sense.

If your pilot light is off for some reason and you need help turning it back on, we recommend calling your gas provider. B&C Comfort generally doesn’t make house calls just to turn on pilot lights, and we would also charge you to service the unit for maintenance.

As for safety, yes, turning off your pilot light will reduce the likelihood of experiencing a gas leak during the spring, summer, and early fall. But those are just as likely in the winter as in the summer – which is to say, gas leaks are very rare. Plus, there are built-in safety mechanisms that shut off the flow of gas if the pilot is leaking.

However, if you ever do smell gas, shutting off your gas valve and turning off the pilot light is the first step to take. Then, call your gas company.

What If I Can’t Figure Out How to Turn On or Off the Pilot Light?

If you can’t figure it out, that’s a good reason to leave it on and not worry about it. Or, you can call a professional and have them take care of it.

Is Turning the Pilot Light Back On As Easy As Turning It Off?

No. Turning off the gas is relatively easy. You just turn the valve and shut off the flow of gas. This extinguishes the small flame that is the pilot light.

Turning it back on is more complicated. If you just turn the valve back on, all this does is resume the flow of gas. But the pilot light is a flame, and it must be relit. As you can imagine, there are some safety considerations here.

That’s why we recommend having a professional from your gas company come in to re-light your pilot light. Again, if you ask B&C Comfort to do it, we will charge you for and perform a full service and maintenance call.

If you don’t want to pay for that, then the simple solution is to leave your pilot light on continuously through the summer. But if for any reason you’d rather turn it off for the warmer months, then make it a habit to book your appointment right then to have it turned back on in the fall.

If you live within our service area in and around Snohomish County (see the complete list of zip codes at the very bottom of our home page), our schedule fills up months in advance.

So if you want to turn off your pilot light in the spring, get on our fall schedule now so you can have it turned back on before the cold weather returns!

How to Change the Air Filter On Your Air Conditioner or Furnace

Friday, January 28th, 2022

So you’ve decided it’s time to change the air filter on your air conditioner or furnace. Good decision! The reality is, you should be changing this regularly, at least a couple times per year even in the mild climate of the Greater Seattle area.

But if you’ve never done it before, how do you change an air filter?

The good news is, it’s actually pretty simple in most cases. We’ll walk you through the basic process. However, if you still aren’t able to figure it out, you can always give us a call and we can try to talk you through it over the phone. Or if necessary, we can come out and help you in person.

Before we get to how to change it, let’s quickly address how you know it’s the right time to change the air filter on your air conditioner.

One good way to test this is to hang a white sheet about five inches away from one of your vents, and leave it there for an hour. If during that time the sheet turns noticeably gray, that’s a good sign your air filter is due for replacement. Also, if there’s a buildup of dust around your vents, no need to use the sheet because that’s also a clear sign your filter is probably clogged up.

And in case you’re wondering, here’s a post on why changing your air filter is so important, and how it protects your health, your wallet, and your comfort.

How to Change an Air Filter in 6 Steps

1. Find the Air Filter

This step might seem silly, but sometimes, especially in larger homes with multiple vents, ducts, and other HVAC equipment, finding the air filter can be a little challenging.

Generally, it will be in the main air handling unit or in the main air duct vent. It could be in the return air duct that pulls air from your home back into the HVAC systems. Or it could be near the air handler that blows out the warm or cool air. This is quite common if your heating and air conditioning systems share the same ducts, which is true in most households.

You probably will have to open up a metal panel on top of the unit if it’s in the actual device, and this might require some unscrewing. In other cases, the door may be held with hooks, or it might just open up with minimal effort.

2. Turn Off the Power

You can turn off the unit or just switch off the circuit breaker. But you want to make sure there is no chance of electricity still operating in the unit when you open it.

3. Remove the Current Air Filter

Next, once you find the air filter and turn off the power, you can remove the current air filter from its location.

When you do this, pay attention to the orientation of the air filter. There are usually arrows printed on the sides of it pointing in one direction, either toward where the air is blowing from, or away from it. You will want to insert the new air filter facing the same direction, so pay attention to the old one before you take it out.

4. Inspect the Current Air Filter to Decide on the Replacement

Once you remove the air filter, take a moment to look at it. It will probably be quite dirty, especially if you’ve never done this before or it’s been a while. Hold it up to the light. If you can’t see much light through it, it’s dirty.

Assuming you need to replace the air filter, you want to learn two things in your inspection:

  1. The size of the air filter that fits in your system
  2. The MERV rating

Air filters come in many sizes. Generally, you’re looking for a length and a width, and it should be printed somewhere on the filter. If you can’t find it, you can always just measure it yourself. To be sure, you can also just bring the filter into the hardware store and make sure the new one you buy is the same size.

MERV stands for minimum efficiency reporting value. The higher the MERV rating, the more effective the air filter is at filtering out particulates. Ratings above 10 are considered able to filter out microorganisms that can impact your health and air quality.

The lowest quality air filters are made of fiberglass. These cost less, but they don’t last as long and need to be replaced more often, like almost every month. Pleated air filters are higher quality and should last several months.

HEPA filters are the highest quality. However, these are so good that in some HVAC systems they can impede airflow so much that the system has to work really hard to heat or cool your home, increasing your costs and risking breakdown. So just going for the highest possible MERV is not necessarily the best idea.

If you’re in doubt, give us a call and we’ll try to help you out over the phone. In general, you should be okay with a MERV rating between 5 and 13.

5. Dispose of the Old Air Filter

Especially if it’s very dirty and filled with possible health hazards, it’s a good idea to slip the old air filter into a plastic bag and then throw it in your usual garbage can.

If you happen to have a reusable filter, then you’ll need to add a step here to clean it and wait for it to dry. Some reusable air filters can be washed with water. Others can be vacuumed. Check the instructions on yours to find out how to clean it.

6. Buy and Insert the New Air Filter

Then, go to the hardware store and pick out the new air filter of the right size and desired MERV rating. Or, order it online. But if you do that, be absolutely certain about the size. Going to the store is a less risky approach because you can compare the old filter to the new one right there.

To insert the new one, slip it in the same way the old one came out. Again, use the arrows on the side to make sure it’s facing the correct direction.

The arrows always face away from the return air duct, and toward the air handler system.  If that’s confusing and you aren’t sure if the original was installed right, give us a call and we will try to talk you through it.

Do I Really Need to Clean My Gas Fireplace?

Thursday, April 18th, 2019

Do I Really Need to Clean My Gas Fireplace?

do i really need to clean my gas fireplace

Image by Sophie Janotta from Pixabay

It’s a good question. After all, your gas fireplace is a lot simpler than a wood-burning fireplace. No chopping, no carrying wood inside on a freezing day. No spiders in the woodpile. No ash. No hot coals to worry about. And best of all – no trouble starting the fire. Just flip a switch.

So there’s a lot to love about gas fireplaces, and it’s easy to get lulled into complacency and believe you don’t need to clean your gas fireplace either.

The truth is, you do need to clean it, just a lot less often than a wood-burning fireplace. The recommended frequency to clean and maintain a gas fireplace is once per year. If you want to use B&C Comfort and are in our service area (click here and scroll all the way to the end), we are regularly booked out several months in advance, so get on our schedule today.

Schedule my fireplace cleaning

Why You Need to Clean Your Gas Fireplace

But why must we clean our gas fireplaces if they burn so cleanly and make no visible mess?

Here’s the simple answer: all fire (combustion) produces waste products.

In general, the products of combustion are water vapor and carbon dioxide. But it’s not that simple. Water can react to metals and form rust, or combine with certain other chemicals to form corrosive acids, even very mild ones that take years to be noticed (see this article from the Chimney Safety Institute for more)  Carbon dioxide is one of those chemicals – it can combine with water to produce carbonic acid. Your fireplace can also create other waste products such as carbon monoxide, which is a deadline odorless gas.

So regardless of what else might be crawling around in your chimney, venting system, and in the components of your fireplace, over time you will build up soot and other residues.

These residues will collect on the glass doors, the internal fireplace parts, the walls, the fake logs, and in the chimney/venting.

They will affect performance.

They will affect visibility.

They will affect safety.

Over time, an uncleaned gas fireplace will develop clogged or partially clogged gas lines and air passages. The motion of your fans will become inhibited. Small leaks can form.

Nothing works forever without ongoing maintenance. And let’s not forget, you are using this fireplace to burn a fire in your house. So, once a year, it’s a pretty smart move to make sure everything is cleaned and in working order.

Additional Gas Fireplace Maintenance Issues

Besides just the residues and soot collecting on everything, your annual fireplace cleaning is the perfect time to make sure everything else is working properly. Here are a few other items a professional can look at while they’re cleaning your fireplace.

  • Check functionality of thermopile and thermocouple, as applicable
  • Check that venting system is working properly (a major safety issue)
  • Look for chipped or cracked glass doors
  • Evaluate status of ceramic or faux logs – these too wear down over time
  • Do a carbon monoxide test

It takes a trained eye to quickly evaluate the quality and functionality of these and other gas fireplace components.

But in addition to cleaning, it’s very important to keep your fireplace working in perfect shape. It maximizes your energy efficiency, maintains optimal safety, and keeps your fireplace looking great.

If you live in our service area (scroll to the end of this page to find out) and haven’t cleaned your fireplace in a long time (or ever), now’s a good time to get on our busy schedule.

Schedule your next fireplace cleaning


7 Reasons Your Home Heater Is Blowing Cold Air & What To Do

Thursday, November 8th, 2018

Home Heater Blowing Cold Air? Here’s What It Could Mean

7 Possible Reasons Your Home Heater/Furnace Is Blowing Cold Air

A friend of ours bought a new house recently. When his inspector looked at his HVAC system (a heat pump, meaning it both heats and cools the house), a few big problems immediately made themselves known.

new homeowner's heater blowing cold air and ac was blowing warm airWhen he turned on the heater, the outdoor unit didn’t seem to be working right, but the indoor unit, an air handler, came on and seemed to heat the house. Though on closer inspection, the heat seemed pretty weak. When he turned on the air conditioner, warm air came out.

So, when the new homeowner called an HVAC specialist (not us, because he was outside our service area – click here and scroll down to see if you’re in it), he learned what was really happening.

A system error in the controls of the heat pump was forcing an automatic system shutdown just seconds after it started. That was tripping on the air handler, which was supposed to be only for emergency heat. Even more strange, the previous owners had rewired the system somehow so the air handler came on every time, even for air conditioning. Hence the hot air.

But the heat pump was also just very old, and repairing it would have cost nearly the same as just getting a new one, which is what they ended up doing.

Why tell this story? Because it illustrates just one of many reasons why a heater might blow cold air, and an air conditioner might blow hot air.

7 Reasons Your Heater Blows Cold Air/AC Blows Hot Air

There are many reasons an HVAC (heating, ventilation, air conditioning) system might stop working. But all you have to work with are the symptoms. The heater’s blowing cold, or the AC is blowing hot. Here are just a few things that could mean:

1) Dead Batteries in Thermostat

Seems silly, but you’d be surprised how often this has happened. You’re standing there pushing buttons trying to heat up the house, but it’s just not working. You can hear it blowing, but no heat is coming out. Sometimes this happens simply because your batteries have died. (This problem depends in part on the type of thermostat, of course).

It’s also possible you have it on the wrong setting, such as ‘fan’ as opposed to ‘heat’. Again, this depends on your specific type of thermostat.

2) Clogged Air Filter

filthy clogged air filters are one possible reason your heater is blowing cold air
For a heat pump or heater to produce warm air, air must flow easily through the filter. Otherwise it has to work a lot harder just to pull the air, which means you’ll get less warm air coming out than you should. Likewise for the air conditioner. The harder it has to work to pull air through the filter, the less efficient it will be.

If energy efficiency is as important to you as heating or cooling your house, making sure you have a clean air filter is a critical troubleshooting and maintenance step.

3) Interrupted Startup Sequence

This was part of the problem our friend was dealing with. His heat pump was starting up and then shutting off immediately, and the emergency heat was taking over. When he had a professional look into why this was happening, he learned it would be an expensive repair job on an outdated heat pump.

4) Improper Installation

The previous owners in our friend’s house probably realized their heat pump was failing, so they rewired the system in a convoluted way to get around the problem, rather than deal with it properly. Their improper installation thus led to the air conditioner blowing hot air.
an improper installation led to this ac blowing warm air

5) Dead Circuit Board

Maybe it got shorted out. Maybe it just died of old age or malfunction. But a dead circuit board ends your furnace’s attempt to heat your house real quick.

6) Worn Down or Busted Motors

Motors that turn the fans and make the conversion process from warm to cold (or cold to warm) work right can get old and rusty, or break down for other reasons. If that happens, your heater (or AC) will not produce the temperature of air you want it to.

If you hear that irritating screeching sound when your system turns on, this could be the reason (though it’s not the only reason that happens).

7) Damaged Ducts

It could be that your heater is working just fine. If your ducts have cracks or worse, then the cold air blowing into your house might be coming straight from outside right into your ducts, mixed in with the warm air your perfectly functional furnace is producing.

What Can I Do If My Heater Is Blowing Cold Air?

You’ve got three basic options.

three options for what to do if your heater is blowing cold air
First – make it worse. That’s what our friend’s former homeowners appear to have done. They worked around a failed heat pump by making the emergency heat the main heat. This rendered the AC useless. And, it increased their heating costs a ton, because the air handler is a far more expensive way to heat a house than the much more efficient heat pump.

Second – test out the simple explanations. Check the air filter. Check the thermostat. You might even try turning your circuit breaker off and back on. These simple fixes might solve the problem, saving you lots of trouble, frustration, and expense.

Third – hire a professional. If your heater is blowing cold air, and it’s not one of the first two possible explanations on this list, then you’ll need a specialist to at least come and take a look. You might be able to tell if your ducts have a leak, but fixing them is another issue.

The last five items on the list above require a professional or a new furnace or heat pump to fix them.

If you need a professional and you live in our service area, we’d love to help.

Click the link below, scroll down to see if you’re in our service area, and if you are, tell us what’s going on with your HVAC system.

Help Fix My Heater/Heat Pump